If you have access to a DVD burner, or just wish to put your images onto a CD-R in 'VCD' format then !ChangeFSI
Most digital cameras produce images in the JPEG ![]() or
or ![]() format. This is a compromise to allow reasonable quality but maintain a smaller file size. Do you want to view them on TV?
format. This is a compromise to allow reasonable quality but maintain a smaller file size. Do you want to view them on TV?
If you have access to a DVD burner, or just wish to put your images onto a CD-R in 'VCD' format then !ChangeFSI ![]() and Jochen Lueg's shareware !FSI_Batch
and Jochen Lueg's shareware !FSI_Batch ![]() (which utilises !ChangeFSI to process images in batches) can help you to produce JPEGS suitable for this purpose.
(which utilises !ChangeFSI to process images in batches) can help you to produce JPEGS suitable for this purpose.
In using Jochen's program you also have a graphical interface rather than the menu driven one of !ChangeFSI. If you have a directory of images to transform then it can be a long and tedious process doing them one by one. This enhancement by Jochen makes the changes painless.
' ... for the theoretical optimum image aspect ratio of 4:3 which, post-scaling, works out at 768 x 576 pixels. However, in practice, we find that, when displayed on a typical TV, the image is slightly cropped down the left and right edges (we understand that, typically, the horizontal timebase is intentionally widened so as to mask any slight instability on the left edge of 'cooking' TVs). If this cropping is a problem, the image can be 'squashed' slightly to that both edges just become visible on the TV display. On our own TV, this works out at 720 pixels (as Sue mentioned) which is convenient as one of Batch_FSI's sub-menu options is 720 x 576 pixels (5:4). But if the optimum image width is some other figure, e.g. 745 pixels, this can be set manually in the X writeable icon.
The procedures we recommend are as follows:
Please note this applies to source images in 4:3 /landscape/ format. The settings for rotated images in portrait format (3:4) are the same with the exception of Item 5 - change the Width writeable icon so that it reads 576 x 3/4 = 432 pixels. (Post-rescaling, the vertical dimension will be 576 pixels, as required to avoid the 'shimmer' phenomenon, but the reduced width of 432 pixels - necessary to retain the 3:4 aspect ratio - will of course result in the image being presented in 'vertical letterbox' format). Please note also that the above applies equally to higher-spec digital cameras as their output format will always be in the 4:3 aspect ratio, e.g. 2048 x 1536 (3Mpixels), 2832 x 2128 (6Mpixels), etc. It's quite acceptable to load a mix of images, with different X/Y pixels, provided thay are all in the 4:3 landscape format. They will all be re-scaled down to 576 pixels in the vertical dimension.
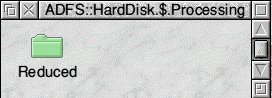
After loading !FSI_Batch ![]() click on the icon that appears on the icon bar to open the window in Fig. 1 Click on Export in the bottom Right Hand corner. When it opens
click on the icon that appears on the icon bar to open the window in Fig. 1 Click on Export in the bottom Right Hand corner. When it opens 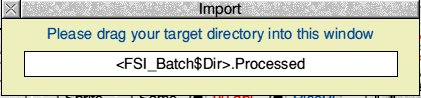 drag and drop the Reduced directory icon into the Import window. This will replace (FSI_Batch$Dir).Processed with the path of the Reduced directory
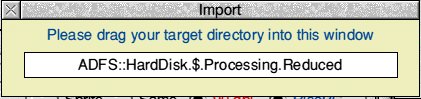
Now you need to set the size of image you require. In the Top left hand corner of Fig. 1 (below) you will see Scale. Under this is a sub-heading with a radio button for Pixels It has said that this needs to be 576 for the vertical dimension. The horizontal needs to be proportional to the original. Using an image of 2048 x 1536 as an example: if 576 represents 0.375 of the original height (with the calculator 576 / 1536 = 0.375) then the width should be calculated to represent one third of the width. e.g. 1024 would become 768 (with the calculator 2048 x 0.375 = 768 which can be rounded to 760)
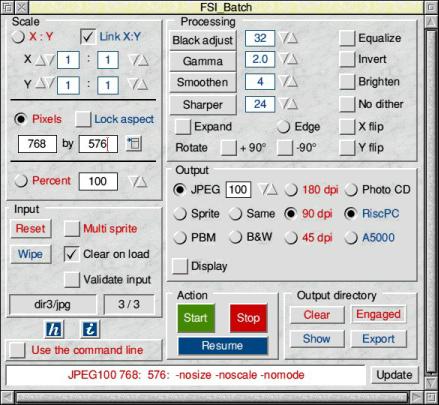
With the deterioration of image quality inherent in compression it is suggested that Output JPEG be set to 100
At the centre bottom is a green Start button 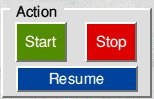 . Drag the images you wish to convert onto this button and the two small windows to the left will change from Empty and 0 files to show where and how many files you have selected. Click on the Start button and wait for the processing. Even with a RiscPC StrongArm my conversions take a while. If you have seventy ot eighty images to do go away and have afternoon tea.
Thumbnails from the Reduced Images
If you want to produce thumbnails of the images in the directory press menu over a blank section of the !Thump display window. Move down to Viewer, across to open and down to Save as Draw and across again to open a window with an icon and a box to name the drawfile. This becomes your collection of thumbnails from the reduced directory. Drop it onto a DTP page and print.
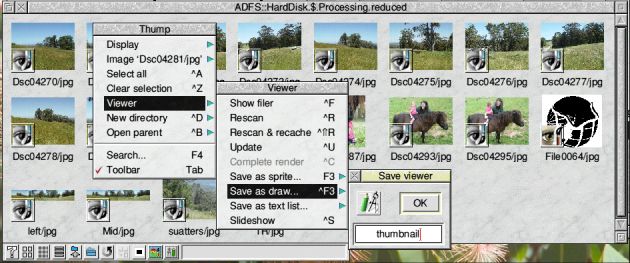
Fig. 2
Be aware that if !Thump is displaying images as eight across and one down that is what the thumbnail from !Draw will be. You should try to make it a 'shape' to fit the page in a Portrait orientation. The example in Fig. 2 would come out as a wide set of thumbnails. Eight across by three deep. Resizing the window to four across by six down would give a better 'shape' to fit on an A4 page.