Most digital cameras produce images in the JPEG ![]() or
or ![]() format. This is a compromise to allow reasonable quality but maintain a smaller file size. Why change them? You may wish to view them quickly in a program like !Thump
format. This is a compromise to allow reasonable quality but maintain a smaller file size. Why change them? You may wish to view them quickly in a program like !Thump ![]() , transmit them to a friend or utilise them in a website. In these cases a smaller data size speeds up things while still retaining the original for quality reproduction on paper if needed at a later date.
, transmit them to a friend or utilise them in a website. In these cases a smaller data size speeds up things while still retaining the original for quality reproduction on paper if needed at a later date.
RISCOS has an excellent application called !ChangeFSI ![]() . If you have a directory of images to transform then it can be a long and tedious process doing them one by one.
. If you have a directory of images to transform then it can be a long and tedious process doing them one by one.
Jochen Lueg has written !FSI_Batch ![]() which utilises !ChangeFSI to process images in batches. In using Jochen's program you also have a graphical interface rather than the menu driven one of !ChangeFSI.
which utilises !ChangeFSI to process images in batches. In using Jochen's program you also have a graphical interface rather than the menu driven one of !ChangeFSI.

Fig. 1
'How to do it!'
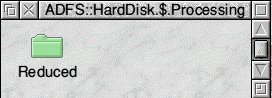
Firstly open a top level directory to place your original images in. e.g. ADFS::HardDisk.$.Processing and then inside it open a directory for the reduced images e.g. ADFS::HardDisk.$.Processing.Reduced
After loading !FSI_Batch ![]() click on the icon that appears on the icon bar to open the window in Fig. 1 (above) Click on Export in the bottom Right Hand corner. When it opens
click on the icon that appears on the icon bar to open the window in Fig. 1 (above) Click on Export in the bottom Right Hand corner. When it opens 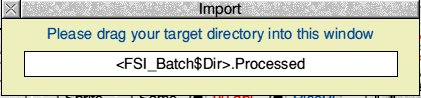 drag and drop the Reduced directory icon into the Import window. This will replace (FSI_Batch$Dir).Processed with the path of the Reduced directory
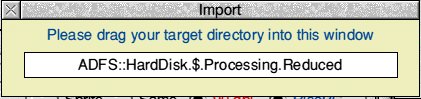
Now you need to decide on what degree of reduction of the image you require. In the Top left hand corner of Fig. 1 (above) you will see Scale. I normally find that selecting the X:Y option and choosing 1:4 gives a reasonable image for the Web or email. I start with a 2048x1536 pixel image. This reduces to 512x384 and 50-70Kb depending on the detail in the original and the level of compression (I use 85 generally) If I need a smaller image, both in viewable area and in file size them I might use 1:5 and compression of 75-80. This is something you can play around with to find the settings that best suit your originals and need.
At the centre bottom is a green Start button 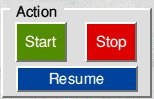 . Drag the images you wish to convert onto this button and the two small windows to the left will change from Empty and 0 files to show where and how many files you have selected. Click on the Start button and wait for the processing. Even with a RiscPC StrongArm my conversions take a while. If you have seventy ot eighty images to do go away and have afternoon tea.
When the processing is finished click on !Thump ![]() to load its icon onto the iconbar. Drag and drop the Reduced directory of images onto the icon. When it opens you can then see which ones need to be rotated.
to load its icon onto the iconbar. Drag and drop the Reduced directory of images onto the icon. When it opens you can then see which ones need to be rotated. 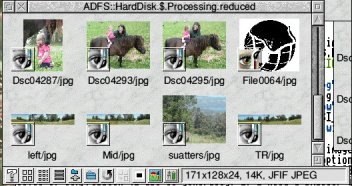
Fig. 2
Make sure that the section of the window labelled Input, Wipe is NOT TICKED. Reset the options in Scale to 1:1, select either Rotate +90 (anticlockwise) or -90 (clockwise) to rotate the image, then select and drag the images from the !Thump window onto the green Start button. Click Start and the change will be very quick compared to the first run.
Click on the recycle arrow (seventh icon from the left at the bottom of the !Thump window. See Fig 2 (above) to see the rotated images.
Thumbnails from the Reduced Images
If you want to produce thumbnails of the images in the directory press menu over a blank section of the !Thump display window. Move down to Viewer, across to open and down to Save as Draw and across again to open a window with an icon and a box to name the drawfile. This becomes your collection of thumbnails from the reduced directory. Drop it onto a DTP page and print.
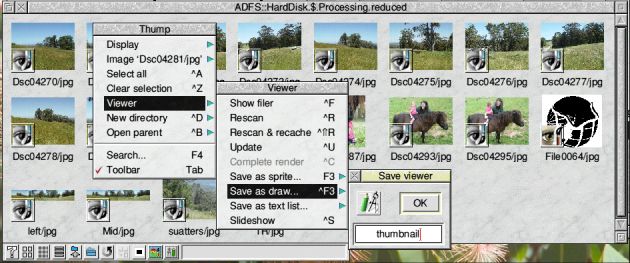
Fig. 3
Be aware that if !Thump is displaying images as eight across and one down that is what the thumbnail from !Draw will be. You should try to make it a 'shape' to fit the page in a Portrait orientation. The example in Fig. 3 would come out as a wide set of thumbnails. Eight across by three deep. Resizing the window to four across by six down would give a better 'shape' to fit on an A4 page.